If you have a WordPress or Blogger website then the first thing you should do is to add your website to Google Search Console. Google Search Console is now a very essential tool for any website owner without which your website posts may not show on Google search results.
Today in Bytes Vibe, I’ll guide you through submitting your Blogger, WordPress, or any other website to Google Search Console and how to index posts on Google Search Console.

What is Google Search Console?
Google Search Console is a free tool provided by Google that helps website owners monitor and improve their site’s performance in Google searches. It’s a powerful resource that can help you optimize your website for better search rankings. If you have a website, using Google Search Console is a major advantage.
Advantages of Google Search Console
Before we start Google Search Console tutorial, let’s see the benefits of using Google search console in website:
- Important Keywords: The “Search Performance by Keywords” report shows which keywords drive the most traffic to your site.
- High-Traffic Pages: The “Site Index” report shows which pages are appearing in searches.
- Fix Compatibility Issues: The “Viewability Issues” report identifies any problems that prevent your website from ranking well.
How to add website to Google Search Console

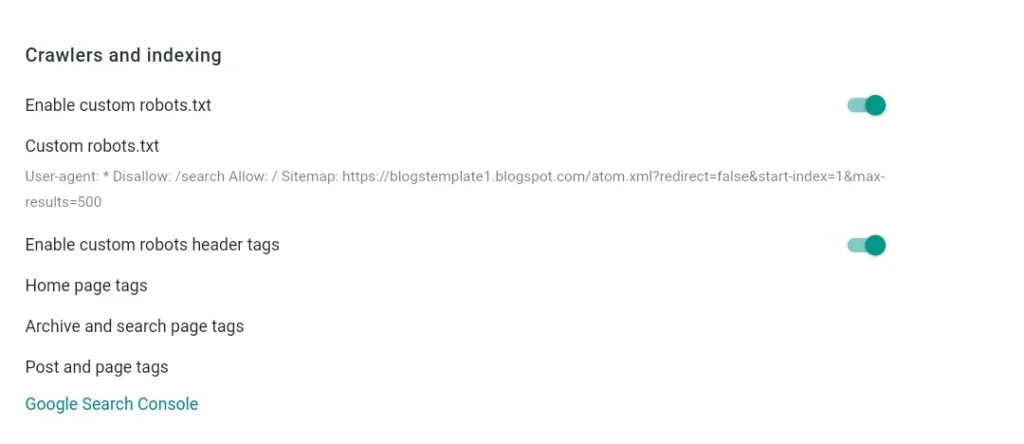
Before proceeding, if you have a Blogger site, edit the robots.txt file. There’s a separate post on this.
Submit website to Google Search Console
Now I will show you how to submit your wordpress or blogger website in your Google search console account. Each step is very important so follow each step well.
Step 1: Access Google Search Console
Go to Google Search Console in your web browser.
Step 2: Sign Up or Sign In
Use your existing Google account to sign in or create a new one if you haven’t already.
Step 3: Add Your Website Property
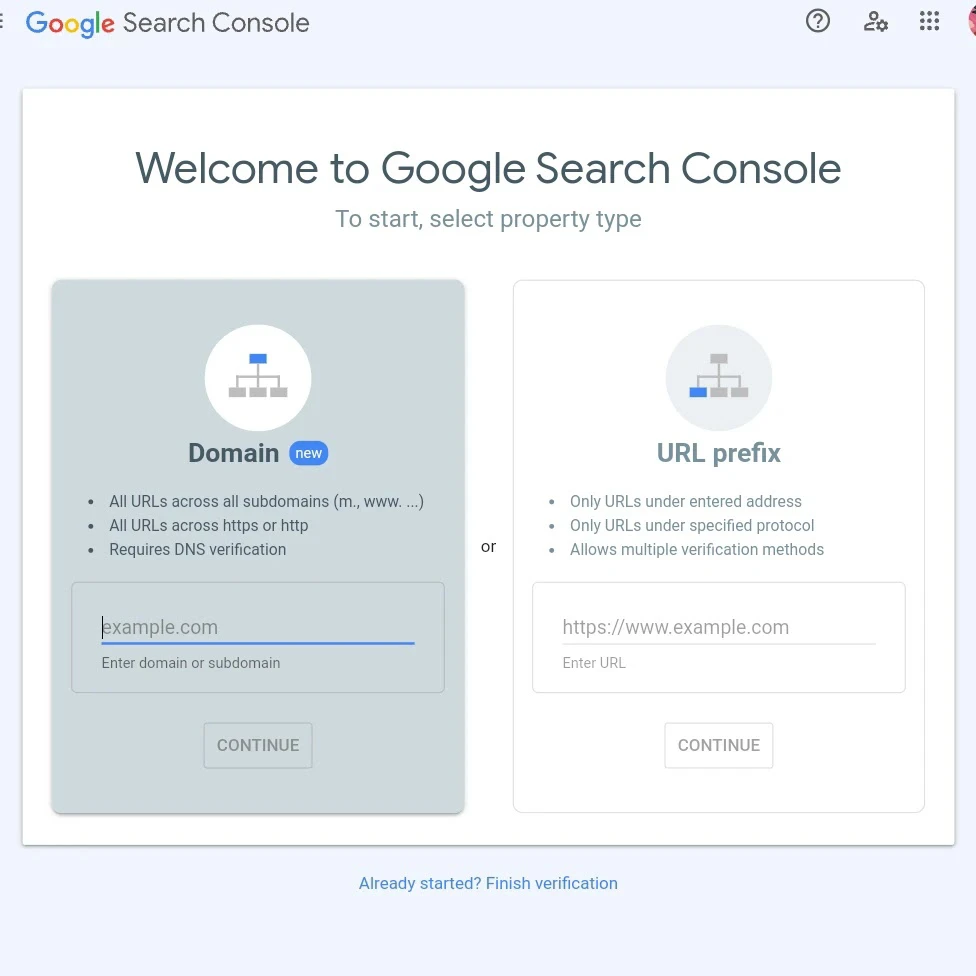
You’ll be presented with two options:

- Domain: Choose this if your website has its own top-level domain (TLD) like “.com,” “.org,” or “.in.” Enter your website name without “www” or “http” (e.g., example.com).
- URL Prefix: To submit a blogger website to Google Search Console select this. This is for websites with a subdomain like “.blogspot.com.” Enter the full URL, including “https”. Do not include “m=1” at the end.
Step 4: Google Search Console verification
Google will need to verify that you own the website. In most cases, google search console verify domain verification is automatic. However, if it isn’t, you can use the provided HTML tag verification method.
Here’s how to verify using the HTML tag method:
- Copy the provided HTML code from Google Search Console.
- Go to blogger theme editor.
- Paste the copied code after the
<head>section of blogger or wordpress website’s code. - Save the changes.
- Go back to Google Search Console and click the “Verify” button.
Step 5: Submit Your Sitemap
A sitemap is a file that lists all your website’s URLs, making it easier for search engines to discover your content.
- Locate the “Sitemaps” option on the left-hand menu in GSC.
- Click on “Sitemaps.”
- Enter the following URLs in the designated box:
- sitemap.xml
- sitemap-pages.xml
Step 6: Submit blogger URLs for Indexing

While submitting a sitemap is helpful, you can also submit individual URLs for faster indexing.
- Click on “URL Inspection” in the left-hand menu.
- Copy the specific URL of the post you want to submit.
- Paste the URL into the search bar and click “Submit.”
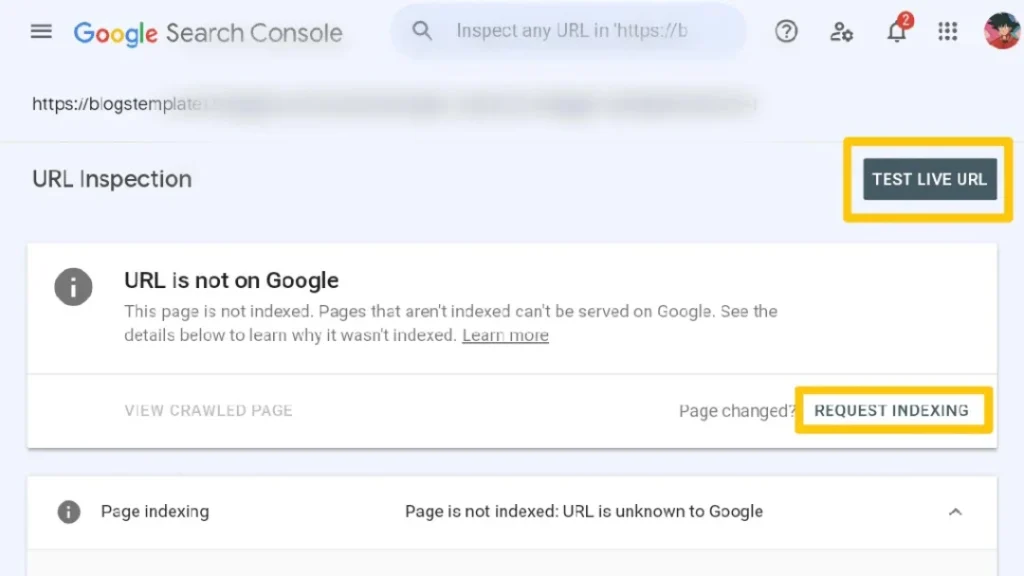
- Click on “Test Live URL” to check for any issues.
- If no issues are found, click on “Request Indexing” to ask Google to index the URL.
After doing these with Bytes Vibe instructions, you have successfully submitted your website to Google Search Console and sped up the process of getting your website indexed. If you have any questions, comment them below.


It was helpful. Thanks for this Bytes Vibe!
ভাইয়া আমার sitemap-pages.xml “couldno’t fetch” লেখা আসে। এটার সমাধান কি? প্লিজ একটু জানাবেন।
টেলিগ্রামের স্ক্রিনশট সহকারে যোগাযোগ করুন। আশা করি সেখানে সলভ করে দিতে পারব।