Welcome to Bytes Vibe blogger tutorial series. In this post, we will learn how we can Create Stylish Material Design Box in Blogger. Creating an eye catching content is a key aspect to make our website stand out. One popular design trend that we can use on our blogger site is Material Design inspired boxes to highlight our many sections. This will gives our blogger site a sleek and modern look. And the best thing is we can use these stylish box in wordpress also.
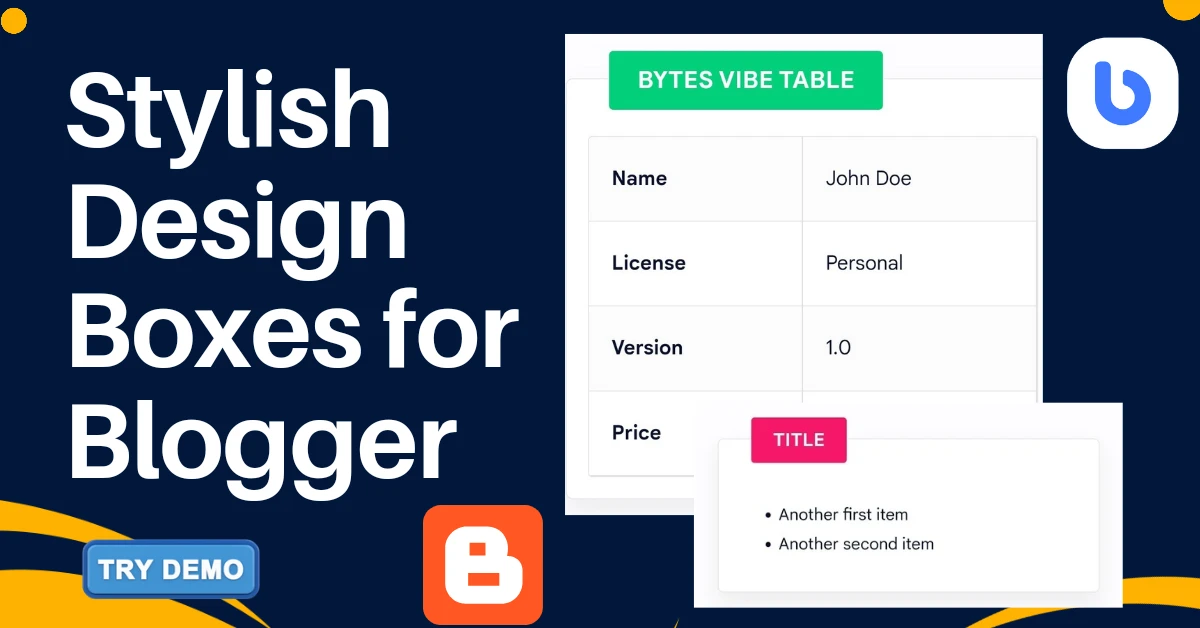
These types of modern and stylish design box is best for business or downloading website. Because we can add these Stylish Material Design Box in Blogger to highlight many important sections. This stylish box can grab user attention which will help any online shop or website.
How to add Stylish Material Design Box in Blogger
Now after watching the demo, if you think that this will suit your blogger website and you want to add these 3 stylish box in blogger website than you just need to copy and paste the code that I have given in this post. With Bytes Vibe material design box, you will get a table box, a description box and a list box. Make sure to take backup of blogger theme before doing any changed.
To create Stylish Material Design Box in Blogger follow these step below:
Step 1. Add the CSS Code to Blogger Template
We will need to add some custom CSS to our Blogger template for these stylish boxes. This will allow us to style the boxes and apply the Material Design look. To Add a Custom Material Design Box in Blog, follow these steps below:
- Log in to Blogger dashboard.
- Go to Section and click on Edit HTML.
- Search for
]]></b:skin>tag by clicking Ctrl + F in keyboard and paste the CSS code just above it:
/* material design box by bytesvibe.com */
.bytesvibebox {
  background-color: #fff;
  position: relative;
  margin: 40px 2px;
  padding: 40px 15px 15px;
  border: 1px solid rgba(230, 230, 230, 1);
  border-radius: 5px;
  box-shadow: 0 10px 20px 0 rgba(30, 30, 30, 0.07);
}
.bytesvibebox h2 {
  background-color: #02d07a;
  border-radius: 3px;
  padding: 8px 20px !important;
  position: absolute;
  margin: 0 !important;
  font-size: 17px !important;
  color: #fff;
  top: -20px;
  font-weight: bold;
  left: 30px;
  text-transform: uppercase;
}
.bytesvibebox.box-yellow h2 {
  background: #e2c601;
}
.bytesvibebox.box-blue h2 {
  background: #2ad2c9;
}
.bytesvibebox.box-red h2 {
  background: #f7176a;
}

/* table detail */
table {
  width: 100%;
  margin: 20px 0px;
  border: 1px solid rgba(230, 230, 230, 1);
  border-radius: 7px;
  overflow: hidden;
  font-size: 14px;
}
table th {
  background-color: transparent;
  padding: 15px 20px;
  border: 1px solid #ddd;
  border-left: 0;
  font-family: Noto Sans;
  font-size: 13px;
}
table td {
  padding: 15px 20px;
  border: 1px solid #ddd;
  border-left: 0;
  border-top: 0;
  vertical-align: middle;
}
Code language: CSS (css)
Now save all the changes. This CSS will allow us to create different variations of content boxes with different background colors.
Step 2. Add the HTML Code to Create Boxes
Now that we have added CSS for stylish design box for Blogger, we can use the following HTML code to display these boxes on our Blogger posts or pages. Simply copy and paste this HTML into the HTML view of Blogger post editor and see the magic of Stylish Material Design Box. I have added demo of all the Material design examples so check them out also.
Example 1: Basic Box
<div class="bytesvibebox">
  <h2>Title</h2>
  <!--Your content here-->
</div>Code language: HTML, XML (xml)
Example 2: Box with Blue Header
<div class="bytesvibebox box-blue">
  <h2>Title</h2>
  <!--Your content here-->
</div>Code language: HTML, XML (xml)
Example 3: Box with Yellow Header and List
<div class="bytesvibebox box-yellow">
  <h2>Bytes Vibe</h2>
  <ul>
    <li>First item</li>
    <li>Second item</li>
  </ul>
</div>
Code language: HTML, XML (xml)
Example 4: Blogger stylish Box with Table
<div class="bytesvibebox">
  <h2>Title</h2>
  <table cellpadding="0" cellspacing="0" style="text-align: left;">
    <tbody>
      <tr><td><b>Name</b></td> <td>Bytes Vibe</td></tr>
      <tr><td><b>License</b></td> <td>Personal</td></tr>
      <tr><td><b>Version</b></td> <td>1.0</td></tr>
      <tr><td><b>Price</b></td> <td>$100</td></tr>
    </tbody>
  </table>
</div>Code language: HTML, XML (xml)
Now just use these codes in blogger post to add Stylish Material Design Box in Blogger.
3. Customizing the box Design
We can easily customize the boxes by changing the background colors, padding, or font size within the CSS. For example, if we want to create a red box than we just need to simply add the class box-red like this:
<div class="bytesvibebox box-red">
  <h2>Red Header</h2>
  <p>This is a red box with content.</p>
</div>
Code language: HTML, XML (xml)
This is how we can customise and change the colour in these design box.
Frequently Asked Questions (FAQ)
These are the Frequently Asked Questions on Stylish Material Design Box for Blogger.
1. Can I use these boxes for other platforms besides Blogger?
Yes, the CSS and HTML code that we provided here can be used on any platform that supports custom HTML and CSS. This can be used on WordPress or any static websites.
2. How do I remove the shadow effect from the box?
If we want to remove the shadow effect from Stylish Material Design Box than we can modify the box-shadow property in the CSS like this:.bytesvibebox {
box-shadow: none;
}
3. Can I create multiple boxes with different colors on one page?
Absolutely! If you want than you can mix and match the boxes with different color headers by using the box-blue, box-yellow, or box-red classes.
Using these Stylish Material Design Box in Blogger is one of the best way to improve the look our Blogger website. These modern boxes are versatile and we can customise them to fit our style or branding needs. By following this Bytes Vibe guide, we can easily Add a Custom Material Design Box in blogger with different colors and layouts to make our posts more engaging and professional.
If there is any problems with the boxes than comment them down below and Bytes Vibe team will help with their best.
credit – wendycode

