Welcome to Bytes Vibe everyone. As an web designer and blogger, I’ve often been asked, “How to create MCQ in Blogger?” or “How to create quiz in blogger website“. By adding quizzes to our Blogger site, we can engage our audience and boost user interaction. Quizzes not only make our content more interesting but also help retain visitors, increase page views, and even drive traffic.
In this Bytes Vibe blogger tutorials, I will walk everyone through the process of adding a Multiple Choice Quiz (MCQ) to Blogger website using a Quiz Script for Blogger. Do not worry even if you’re a beginner or an experienced blogger, this post will help to integrate quizzes into blogger without the need for complex coding knowledge.
Features of the MCQ Quiz Script for Blogger:
Before we dive into the technical details of creating MCQs on Blogger, let’s first discuss the feature of mcq quiz in blogger:
1. Multiple Choice Question Format:
We can create a variety of multiple-choice questions for quiz. It supports a set of options (A, B, C, D) for each question.
2. Automatic Answer Evaluation:
It lets user’s to check if the selected answer is correct or wrong. It also displays immediate feedback on whether the selected answer is right or wrong.
3. Real-Time Scoring:
It calculates the total score as the user progresses through the quiz. This blogger quiz also shows the number of correct answers, incorrect answers, and overall percentage.
4. Explanation Display:
This mcq quiz in blogger shows an explanation for each question after the user answers. This helps users understand why an answer is correct or incorrect.
With these benefits in mind, let’s get started on how to create MCQ in Blogger.
How to add mcq quiz in blogger site?
Now let’s go to the main part of tutorial. Follow these steps below to create quiz in blogger:
Step 1: Choose a Quiz Script for Blogger
The first thing we need is a Quiz Script for Blogger. This script allows us to create quizzes that users can interact with. We can either write our own script from scratch or use the pre made scripts that i have modified.
For Blogger, the easiest way to add quiz in blogger website is by using simple HTML, CSS, and JavaScript code. In this way, we can embed a quiz script into our Blogger post or page with just a few lines of code.
Step 2: CSS MCQ code for Blogger
We need to add css for mcq in blogger. This will will make our mcq more beautiful and easy to use. To add css in MCQ code for Blogger, follow these steps:
- Log in to blogger dashboard and go to theme section.
- Click on Edit Html from themes.
- Search for
</b:skin>and paste the following codes before it.
.quiz-container{max-width:800px;margin:50px auto;padding:20px;border-radius:10px;background-color:#ffffff;box-shadow:0 4px 8px rgba(0,0,0,0.1);font-family:'Roboto',sans-serif}
.timer{text-align:center;font-size:18px;font-weight:bold;color:#333;margin-bottom:20px}
.question{font-size:20px;font-weight:600;margin-bottom:15px;color:#222}
.option{margin:10px 0;padding:15px;border-radius:10px;background-color:#f9f9f9;cursor:pointer;font-size:16px;color:#000;/* Pure black text */
    transition:background-color 0.3s ease-in-out;text-align:center}
.option:hover{background-color:#f1f1f1}
.selected{background-color:#e0f7fa;color:#007acc}
.correct{background-color:#d4edda;color:#28a745}
.wrong{background-color:#f8d7da;color:#dc3545}
.explanation{margin-top:15px;padding:12px;background-color:#f8f9fa;border-left:4px solid #17a2b8;font-size:15px;border-radius:8px;display:none;color:#333}
.report-card{margin-top:30px;padding:20px;border-radius:10px;background-color:#ffffff;box-shadow:0 4px 8px rgba(0,0,0,0.1);font-size:18px;text-align:center;color:#333}
.report-card h2{font-size:24px;margin-bottom:10px;color:#007acc}
.report-card p{margin:8px 0}
#restartQuiz{display:inline-block;margin:20px auto;padding:12px 30px;background-color:#007acc;color:white;border:none;border-radius:8px;cursor:pointer;font-size:16px;font-weight:bold;text-transform:uppercase;transition:background-color 0.3s ease-in-out}
#restartQuiz:hover{background-color:#005fa3}
@media (max-width:768px){.quiz-container{padding:15px}.question{font-size:18px}.option{padding:12px;font-size:14px}.report-card{font-size:16px}#restartQuiz{padding:10px 20px;font-size:14px}}
@media (max-width:480px){.quiz-container{padding:10px}.timer{font-size:16px}.question{font-size:16px}.option{padding:10px;font-size:13px}.report-card h2{font-size:20px}#restartQuiz{font-size:12px;padding:8px 16px}}
Code language: CSS (css)
A visually appealing quiz section in blogger will encourage our users to participate. So we need to make sure that our quiz looks good and is easy to navigate.
Step 3: Create Your MCQ Questions
Once we have added the CSS for the Quiz Script for Blogger, the next step is to create Multiple Choice Questions (MCQs) in blog post.
Follow these steps below to create mcq quiz in blogger:
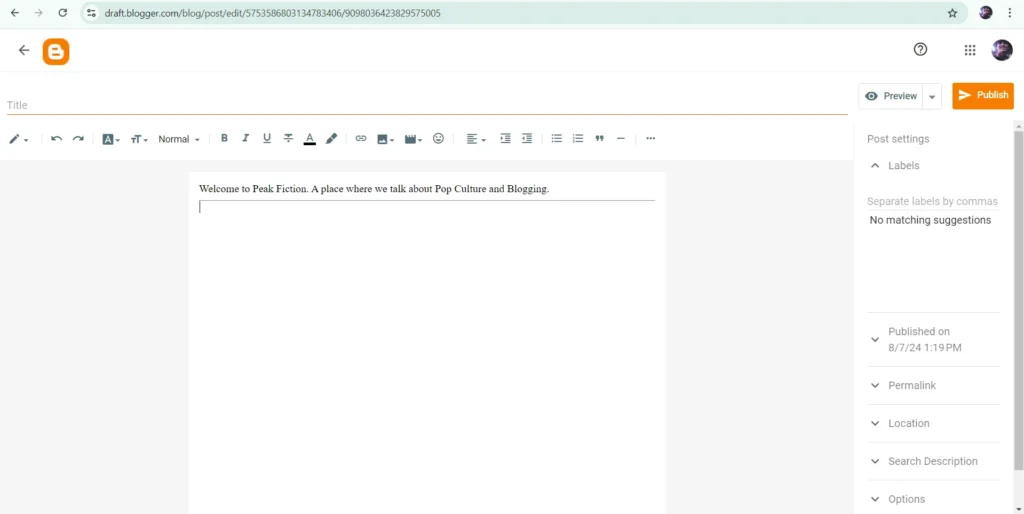
- Log in to blogger dashboard and click on create a new post.
- Join this telegram group and write #mcquiz and you will get the post format for mcq quiz for blogger post.
- Just copy all the codes and paste it in blogger post section.
Remember we just need to edit the html section like questions, answer and option. Do no edit anything unnecessary and the code may not work.
Step 4: Edit the mcq question in blogger
Now let’s see how we can change the question or create a new question in blogger post. The main part of html is like this –
<div class="question" id="question1">Question 1: What is 2 + 2?</div>
        <div class="option" data-question="question1" data-correct="true">A) 4</div>
        <div class="option" data-question="question1" data-correct="false">B) 5</div>
        <div class="option" data-question="question1" data-correct="false">C) 6</div>
        <div class="option" data-question="question1" data-correct="false">D) 7</div>
        <div class="explanation" data-question="question1">Explanation: 2 + 2 equals 4.</div>

Code language: HTML, XML (xml)
We can copy and paste this in blogger post for additional questions. Let’s see how this code works:
- The First line is the question. You need to write your question here. And change the number
question1toquestion2,question3etc in whole code if you use more questions. - Number 2, 3, 4, 5 are the options for the question. You can add the question option here for user to select.
- Number 6 line is explainable part. We can explain here why the option is correct. That’s way user can learn more about the correct answer.
Now the most important part is how can we select the correct answer. If we see the codes line from number 2-5 than we will see that there is a option of true and false. We just need to edit the true/false and write true in the correct answer. The JavaScript will do the rest part.
<div class="option" data-question="question1" data-correct="true">A) 4</div>
<div class="option" data-question="question1" data-correct="false">B) 5</div>
So this is how we can choose the correct answer for users. And if we want to add why this answer is correct, we just need to write the explanation at the last line.
You can customize the questions as per your blog’s niche. Remember to change only from the Html and not any other codes.
Conclusion: How to Create MCQ in Blogger?
In this guide, we’ve covered the essential steps on how to create MCQ in Blogger. This Bytes Vibe guide from selecting the right Quiz Script for Blogger to embedding it into blogger posts. By adding quiz section in Blogger site we can increase website engagement, collect data, and make our content more interactive.
By following the simple steps outlined in this guide, we can easily create and customize our own quizzes in Blogger.
So, are you ready to add quizzes to your Blogger site? Start creating engaging quizzes today and see how they can enhance user blogging experience!

