Hello Guys, Welcome to Bytes Vibe blogger tutorial series. This post is on how we can create Stylish Link Preview Post Card in Blogger websites posts. So many of us like to share links or posts of other websites or own websites posts in a blogger post. But in blogger posts section, there is no option to live preview that link. With this tool, we can easily create a preview card for any links or YouTube Videos and use it in blogger posts.
This stylish post card codes was created by one of our telegram group members and he shared it with us. If you sant to share your own codes with more audiences than sent us a message on Telegram.
How to Create Stylish Link Preview Post Card in Blogger site?
By adding link preview cards in Blogger website, we can make external links like post or YouTube video more engaging for our readers. This allow you to display a visual snippet of the link. We just need to add the link and this script will automatically generate an image, title, and description from that link. This gives our readers a preview of what they’re about to visit. We can also use this card to show related posts in blogger. In this tutorial, I’ll show you how to create a responsive and modern link preview card in Blogger website.
Follow these steps below to create Stylish Link Preview Post Card in Blogger:
Step 1: Add CSS for link preview post card
Okay, the first step we need to do to create Stylish Link Preview Post Card in Blogger is to add CSS to make this link preview stylish and modern. Follow these steps –
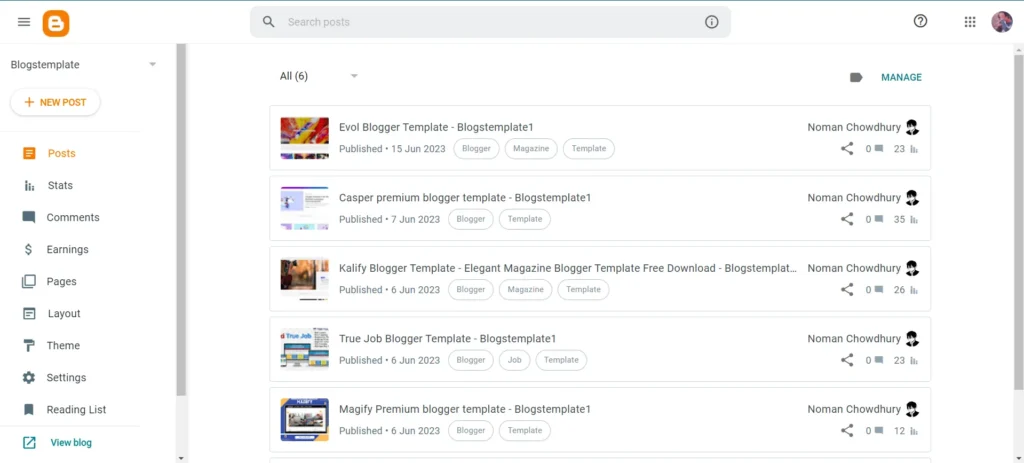
- Log in to blogger Dashboard and go to theme section.
- Click on Customise and from than go to Advanced. Now scroll down and select to Add CSS option.
- Now paste the css from below in add css section.
/* Raised Hover Effect Card by Bytes Vibe*/
.card-container {
    max-width: 500px;
    margin: 20px auto;
}

.link-card {
    background-color: #fff;
    border: 1px solid #e2e8f0;
    border-radius: 12px;
    overflow: hidden;
    text-decoration: none;
    box-shadow: 0 4px 6px rgba(0, 0, 0, 0.1);
    transition: transform 0.3s ease, box-shadow 0.3s ease;
}

.link-card:hover {
    transform: translateY(-8px);
    box-shadow: 0 10px 20px rgba(0, 0, 0, 0.15);
}

.card-image {
    width: 100%;
    height: 200px;
    object-fit: cover;
}

.card-content {
    padding: 16px;
    color: #2d3748;
}

.card-content h4 {
    font-size: 1.4rem;
    margin-bottom: 10px;
    font-weight: 700;
    color: #2d3748;
}

.card-content p {
    font-size: 1rem;
    margin: 0;
    color: #4a5568;
}

/* Mobile Friendly */
@media (max-width: 600px) {
    .card-content {
        padding: 12px;
    }

    .card-image {
        height: 150px;
    }
}Code language: CSS (css)
Now save all the changes in blogger theme. You can change the css code further to match your style.
Step 2: Create Link Preview API
Okay, now that we have added css, we need to create our own API for this tool to work. Follow these steps to create link preview api for free:
- Go to link preview website and create an account.
- Than click on create API to create a free api.
- Now copy the newly generated api code and save it in notes or anywhere so that we can use it later.
Step 3: Add JavaScript in blogger
Now for this link preview post card to work in blogger we need to add JavaScript to automatically fetch the link and make a preview of that link. Follow these steps to add JavaScript in blogger theme:
- Log in to blogger website.
- Go to theme section and click on drop down icon and select Edit Html.
- Now search for
</body>and paste the codes below just above it.
<script>
//<![CDATA[
document.addEventListener("DOMContentLoaded",function(){const t=document.querySelectorAll(".card-container");function n(t){const n=t.match(/\/(\d{4})\/(\d{2})\//);if(n){const[,t,e]=n;return new Date(t,parseInt(e)-1,1).toLocaleDateString("es-ES",{year:"numeric",month:"long"})}return"Fecha no disponible"}t.forEach(function(t){const e=t.querySelector("a").getAttribute("href"),c="YOUR_LINKPREVIEW_API_KEY",r=`https://api.linkpreview.net/?key=${c}&q=${e}`;n(e);fetch(r).then(t=>t.json()).then(n=>{const c=n.title,r=n.image;t.innerHTML=`<a href="${e}" class="link-card"><img src="${r}" alt="Article thumbnail" class="card-image"><div class="card-content"><span class="badge">Read also</span><h3 class="title">${c}</h3></div></a>`}).catch(t=>{console.error("Error fetching link preview:",t)})})});
//]]>
</script>    Code language: HTML, XML (xml)
Make sure to change the text YOUR_LINKPREVIEW_API_KEY with your own API key that we got from step 2.
Now save the settings in blogger theme. This script fetches the link’s details (title, description, and image) and inserts them into the card. And with this, most of our work is done to create Stylish Link Preview Post Card in Blogger.
Step 4: Add Html in blogger posts
Now our final step is to add html in blogger post where we want to preview post or YouTube videos. Follow these steps:
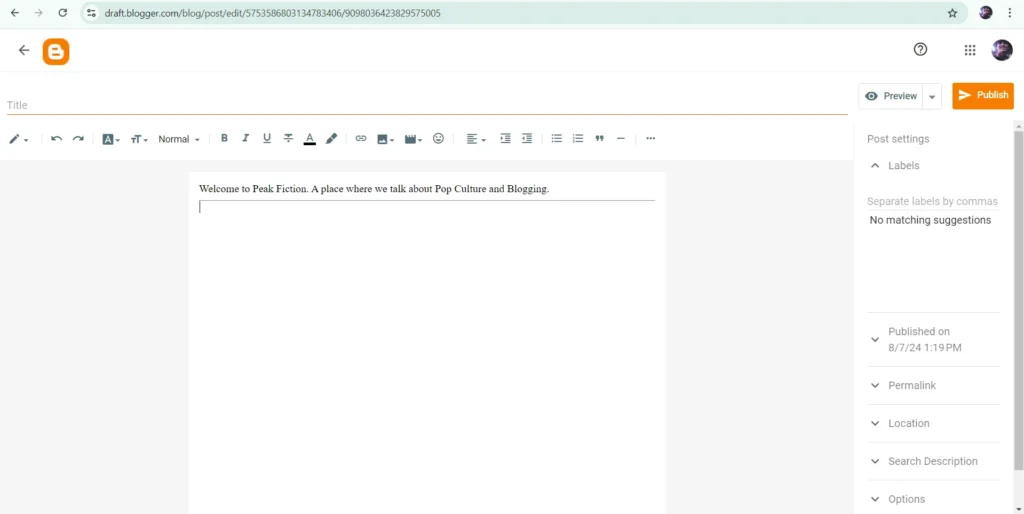
- Go to Blogger Post section and make sure to change the post style in Html View.
- Now copy and paste the codes below wherever you want to show this link preview card.
<div class="card-container">
    <a href="https://www.atariteca.net.pe/2024/09/primer-vistazo-qbfox-el-peculiar-zorro.html" class="link-card">
        <img src="" class="card-image" id="cardImage" alt="Link Preview Image">
        <div class="card-content">
            <h4 id="cardTitle">Loading...</h4>
            <p id="cardDescription">Please wait while we load the content.</p>
        </div>
    </a>
</div>
Code language: JavaScript (javascript)
Make sure to change the link from 2nd line with your own link.
Now if you save your blogger post or page than you will find a beautiful post card or YouTube video in your blogger post.
Conclusion
So this is how we can create Stylish Link Preview Post Card in Blogger. By using this simple yet stylish link preview card, we can upgrade our blogger website’s look. Try this out on your Blogger website and watch how it improves the user experience and engagement!
If you have any questions or want to customize the design further, feel free to reach out via the comments section or contact me directly on Bytes Vibe.
Happy coding!

