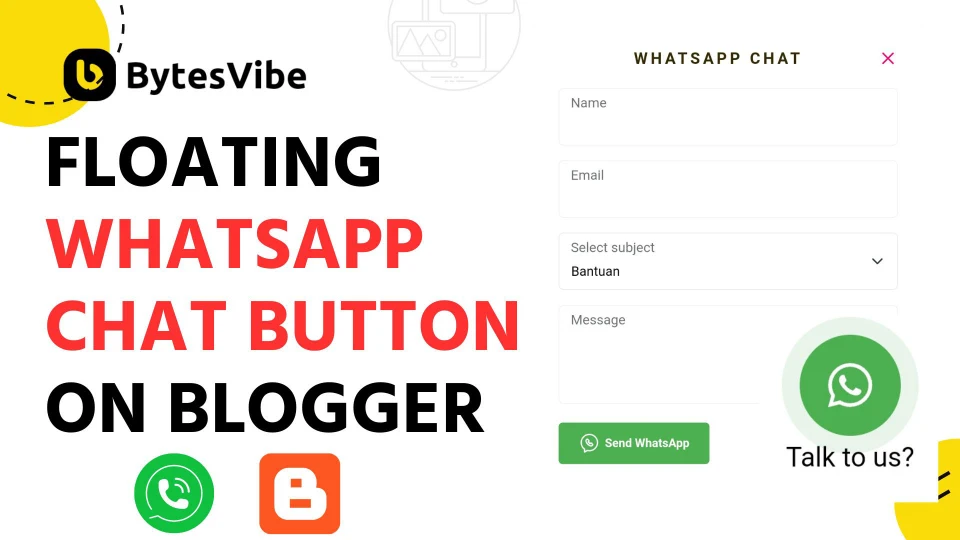
Welcome to Bytes Vibe blogger tutorial series. In this tutorial, we will learn how we can add a Floating WhatsApp Chat box in blogger. A floating WhatsApp chat button or contact form on our Blogger site can improve our interaction with visitors. This allow our visitors to reach us directly with just one click.
If we are running a blog, e-commerce site, or providing services than having this WhatsApp integration in blogger sites adds a personal touch of communication. Instant chat can also increase trust and engagement with audience like creating a grid Showcase.
In this guide, I will walk you through how to add a floating WhatsApp chat contact form to Blogger site. This form will allow visitors to instantly contact us via WhatsApp which will make communication easier and more direct.
How to add a Floating WhatsApp Chat box in blogger?
Now if we want to add live chat in blogger with whats app than we need to follow these steps below:
Step 1: Log in to Blogger dashboard and take backup of blogger theme before doing any customizations.
Step 2: We need to open blogger dashboard. From there go to Theme section and click on Edit Html.
Step 3: Search for ]]></b:skin> and then copy and place the following CSS right above that code:
/* CSS Chatbox WhatsApp By Jago Desain And Redesigned By BytesVibe */
svg {
  width: 22px;
  height: 22px;
  vertical-align: middle;
  fill: #fff;
}

.chatMenu, .chatButton .svg-2 {
  display: none;
}

a#send-it {
  color: #555;
  width: 55px;
  margin: 5px;
  font-weight: 700;
  padding: 10px;
  background: #f0f5fb;
  border-radius: 15px 3px 15px 15px;
  text-decoration: none;
}

a#send-it:hover {
  opacity: .8;
}

.chatStart input[type="text"] {
  padding: 10px;
  margin: 0;
  width: 80%;
  border: none;
  color: #555;
}

.chatStart input[type="text"]:focus {
  outline: none;
}

.chatMenu {
  display: none;
}

.chatButton {
  position: fixed;
  background-color: #25D366; /* WhatsApp Green */
  bottom: 20px;
  right: 20px;
  border-radius: 50px;
  z-index: 20;
  overflow: hidden;
  display: flex;
  align-items: center;
  justify-content: center;
  width: 50px;
  height: 50px;
  -webkit-transition: all .2s ease-out;
  transition: all .2s ease-out;
}

.chatButton svg {
  margin: auto;
  fill: #fff;
}

.chatButton svg.svg-2 {
  display: none;
}

.chatBox {
  position: fixed;
  bottom: 70px;
  right: 20px;
  width: 320px;
  -webkit-transition: all .2s ease-out;
  transition: all .2s ease-out;
  z-index: 21;
  opacity: 0;
  visibility: hidden;
  line-height: normal;
}

.chatContent {
  border-radius: 15px;
  background-color: #fff;
  box-shadow: 0 5px 15px 0 rgba(0, 0, 0, .05);
  overflow: hidden;
}

.chatHeader {
  position: relative;
  display: flex;
  align-items: center;
  padding: 15px 20px;
  background-color: #25D366; /* WhatsApp Green */
  overflow: hidden;
}

.chatHeader img {
  border-radius: 100%;
  width: 50px;
  float: left;
  margin: -2px 10px 0 0;
}

.chatHeader .chatTitle {
  padding-left: 16px;
  font-size: 14px;
  font-weight: 700;
  color: #fff;
}

.chatHeader .chatTitle span {
  font-size: 11.5px;
  display: block;
  line-height: 1.58em;
}

.chatHeader:before {
  content: "";
  bottom: 14;
  right: 0;
  width: 12px;
  height: 12px;
  box-sizing: border-box;
  background-color: #4dc247;
  display: block;
  position: absolute;
  z-index: 10;
  border-radius: 100%;
  border: 2px solid #25D366; /* WhatsApp Green */
  left: 55px;
}

.chatText {
  display: flex;
  flex-wrap: wrap;
  margin: 25px 20px;
  font-size: 12px;
  color: #505050;
}

.chatText span {
  display: inline-block;
  margin-right: auto;
  padding: 10px 10px 10px 20px;
  background-color: #f0f5fb;
  border-radius: 3px 15px 15px;
}

.chatText span:after {
  content: 'Just Now';
  margin-left: 15px;
  font-size: 9px;
  color: #989b9f;
}

.chatText span.typing {
  margin: 15px 0 0 auto;
  padding: 10px 20px 10px 10px;
  border-radius: 15px 3px 15px 15px;
}

.chatText span.typing:after {
  display: none;
}

.chatBox .chatStart {
  display: flex;
  align-items: center;
  margin-top: 15px;
  padding: 18px 20px;
  border-radius: 10px;
  background-color: #fff;
  overflow: hidden;
  font-size: 12px;
  color: #505050;
}

.chatMenu:checked + .chatButton {
  -webkit-transform: rotate(360deg);
  transform: rotate(360deg);
}

.chatMenu:checked + .chatButton svg.svg-1 {
  display: none;
}

.chatMenu:checked + .chatButton svg.svg-2 {
  display: block;
}

.chatMenu:checked ~ .chatBox {
  bottom: 90px;
  opacity: 1;
  visibility: visible;
}
Code language: CSS (css)
Now again save the changes in blogger theme of WhatsApp widget for Blogger.
Step 4: Now we need Floating WhatsApp button javascript. Place the javascript below above the code </body>.
<input class='chatMenu hidden' id='offchatMenu' type='checkbox'/>
<label class='chatButton' for='offchatMenu'>
  <svg class='svg-1' viewBox='0 0 32 32'><g><path d='M16,2A13,13,0,0,0,8,25.23V29a1,1,0,0,0,.51.87A1,1,0,0,0,9,30a1,1,0,0,0,.51-.14l3.65-2.19A12.64,12.64,0,0,0,16,28,13,13,0,0,0,16,2Zm0,24a11.13,11.13,0,0,1-2.76-.36,1,1,0,0,0-.76.11L10,27.23v-2.5a1,1,0,0,0-.42-.81A11,11,0,1,1,16,26Z'></path><path d='M19.86,15.18a1.9,1.9,0,0,0-2.64,0l-.09.09-1.4-1.4.09-.09a1.86,1.86,0,0,0,0-2.64L14.23,9.55a1.9,1.9,0,0,0-2.64,0l-.8.79a3.56,3.56,0,0,0-.5,3.76,10.64,10.64,0,0,0,2.62,4A8.7,8.7,0,0,0,18.56,21a2.92,2.92,0,0,0,2.1-.79l.79-.8a1.86,1.86,0,0,0,0-2.64Zm-.62,3.61c-.57.58-2.78,0-4.92-2.11a8.88,8.88,0,0,1-2.13-3.21c-.26-.79-.25-1.44,0-1.71l.7-.7,1.4,1.4-.7.7a1,1,0,0,0,0,1.41l2.82,2.82a1,1,0,0,0,1.41,0l.7-.7,1.4,1.4Z'></path></g></svg>
  <svg class='svg-2' viewBox='0 0 512 512'><path d='M278.6 256l68.2-68.2c6.2-6.2 6.2-16.4 0-22.6-6.2-6.2-16.4-6.2-22.6 0L256 233.4l-68.2-68.2c-6.2-6.2-16.4-6.2-22.6 0-3.1 3.1-4.7 7.2-4.7 11.3 0 4.1 1.6 8.2 4.7 11.3l68.2 68.2-68.2 68.2c-3.1 3.1-4.7 7.2-4.7 11.3 0 4.1 1.6 8.2 4.7 11.3 6.2 6.2 16.4 6.2 22.6 0l68.2-68.2 68.2 68.2c6.2 6.2 16.4 6.2 22.6 0 6.2-6.2 6.2-16.4 0-22.6L278.6 256z'></path></svg>
</label>

<div class='chatBox'>
  <div class='chatContent'>
    <div class='chatHeader'>
      <img src='https://www.bytesvibe.com/wp-content/uploads/2024/08/cropped-Bytes-7.png' alt="BytesVibe Logo"/>
      <div class='chatTitle'>BytesVibe <span>Usually replies within an hour</span></div>
    </div>
    <div class='chatText'>
      <span>Hello, how can we help you?</span>
      <span class='typing'>...</span>
    </div>
  </div>
  <div class='chatStart'><input type='text' id='chatInput' placeholder='Type your message here'/>
   <a href='javascript:void;' id='send-it'>Send</a>
  </div>
</div>

<script>
//<![CDATA[
//jQuery Widget Chat Box Whatsapp By BytesVibe
$('#send-it').click(whatsappchat);

function whatsappchat() {
    /* WhatsApp Settings */
    var walink = 'https://web.whatsapp.com/send',
        phone = '6281311xxxxxx'; // Your WhatsApp number
    /* Mobile Support */
    if (/Android|webOS|iPhone|iPad|iPod|BlackBerry|IEMobile|Opera Mini/i.test(navigator.userAgent)) {
        var walink = 'whatsapp://send';
    }
    var inputChat = $('#chatInput').val(), //Getting the user message input
        input_viaUrl = location.href; //Getting the current URL
    var bytesvibe_whatsapp = walink + '?phone=' + phone + '&text=' + inputChat + '%0A%0A' + 'Sent via: ' + input_viaUrl;
    /* Open WhatsApp window */
    window.open(bytesvibe_whatsapp, '_blank');
    window.location.href = input_viaUrl; //Refresh the page after message is sent
}
///]]>
</script>

Code language: JavaScript (javascript)
Now save all the JavaScript changes in blogger theme that we did to add a Floating WhatsApp Chat box in blogger.
Customise: Be sure to add your WhatsApp number in the marked area with country code added and remove the existing one. Also if you want than change the texts and logo from marked area.
Troubleshooting
This WhatsApp chat widgets may not work if we don’t have any jQuery installed in our blogger theme. No need to add this one if there is already existing in blogger theme. But if there is no jqueary installed in blogger than add this code below <head>.
<script src='https://cdnjs.cloudflare.com/ajax/libs/jquery/3.5.1/jquery.min.js'/>Code language: HTML, XML (xml)By adding a floating WhatsApp chat button to Blogger site we can improve communication and build stronger relationships with our audience. It’s a simple but best way to boost user interaction and provide instant support.
This tutorial of Create WhatsApp button on website is just a starting point because if needed than you can further customize the button’s design, add animations, or even create a more advanced contact form.
Feel free to reach out if you need more tips or help adding the WhatsApp chat button into Blogger site!

